Digitizing old photos with a document scanner is an effective way to preserve precious physical memories, making them shareable and safeguarding them from environmental degradation. While dedicated photo scanners exist, many modern document scanners, especially flatbed models, offer the necessary resolution and scanning bed for high-quality photo digitization. This guide details the process, from preparing photos to mastering scanner settings, to ensure digital longevity for your cherished images.
Understanding Document Scanners for Photo Digitization
A document scanner can indeed digitize old photographs effectively, particularly if it has the right features and is used correctly. Although primarily designed for text, many contemporary document scanners, especially flatbed types, provide the resolution and scanning surface needed for quality photo digitization.
Types of Scanners and Their Suitability
When using your document scanner for photos, consider its type:
- Flatbed Scanners: These are the preferred choice for digitizing old, fragile, or delicate photographs, as well as those with irregular sizes. They feature a flat glass surface where photos are placed, eliminating any moving parts that could potentially bend or damage your originals. Flatbed scanners excel at capturing fine details and textures, offering high Dots Per Inch (DPI) settings essential for preserving image quality.
- ADF (Automatic Document Feeder) Scanners: While tempting for their speed, allowing you to scan multiple photos at once, ADF scanners are generally best suited for sturdy, standard-sized photographs in good condition. There is an inherent risk of bending, creasing, or otherwise harming fragile or very old prints as they pass through the feeder mechanisms. If using an ADF scanner for photos, always consider using a carrier sheet to protect delicate items.
For optimal photo digitization, look for a document scanner with a high optical resolution, ideally at least 1200 DPI, and even 2400 DPI for exceptionally complex images or if you plan significant enlargements. Some advanced models may also include a transparency unit, which is invaluable if you also wish to digitize film negatives or slides.
Preparing Your Old Photos for Scanning
Achieving high-quality digital scans starts with proper preparation of both your scanning environment and the photographs themselves. This prevents further damage to originals and ensures the best results.
Creating an Optimal Environment
Set up your scanner in a clean, dust-free room on a stable, flat surface. Dust is the enemy of a clear scan, as every speck on your photos or scanner bed will appear in your digital image. Avoid direct sunlight near your scanning area, as prolonged exposure can further degrade old paper and photographs. A well-lit, but not overly bright, workspace is ideal for inspecting your photos.
Gentle Handling
|
Our Picks for the Best Document Scanner in 2026
As an Amazon Associate I earn from qualifying purchases.
|
||
| Num | Product | Action |
|---|---|---|
| 1 | Epson WorkForce ES-50 Portable Sheet-Fed Document Scanner for PC and Mac |

|
| 2 | ScanSnap iX2500 Wireless or USB High-Speed Cloud Enabled Document, Photo & Receipt Scanner with Large 5" Touchscreen and 100 Page Auto Document Feeder for Mac or PC, Black |
|
| 3 | Canon imageFORMULA R10 - Portable Document Scanner, USB Powered, Duplex Scanning, Document Feeder, Easy Setup, Convenient, Perfect for Mobile Users |
|
| 4 | Brother DS-640 Compact Mobile Document Scanner, (Model: DS640) 1.5"x2"x11.9" |
|
| 5 | ScanSnap iX1300 Compact Wireless or USB Double-Sided Color Document, Photo & Receipt Scanner with Auto Document Feeder and Manual Feeder for Mac or PC, White |
|
| 6 | ScanSnap iX1300 Compact Wireless or USB Double-Sided Color Document, Photo & Receipt Scanner with Auto Document Feeder and Manual Feeder for Mac or PC, Black |
|
| 7 | ScanSnap iX2500 Wireless or USB High-Speed Cloud Enabled Document, Photo & Receipt Scanner with Large 5" Touchscreen and 100 Page Auto Document Feeder for Mac or PC, White |
|
| 8 | Canon imageFORMULA R40 Office Document Scanner Receipt Edition, for PC and Mac, Scan & Extract Data to QuickBooks Online, Color Duplex Scanning, Auto Document Feeder, Easy Setup for Office Or Home Use |
|
| 9 | Doxie Pro DX400 - Duplex Document Scanner and Receipt Scanner For Home and Office With Amazing Software for Mac and PC |
|
| 10 | Epson Workforce ES-C220 Compact Desktop Document Scanner with 2-Sided Scanning and Auto Feeder (ADF) for PC as Well as Mac |
|
Old photographs are often brittle and susceptible to damage from natural oils and dirt. Always wear clean white cotton gloves when handling your photos, especially those that are very old or sensitive. For extremely delicate items, consider placing them in acid-free protective sheets or paper before scanning for an extra layer of protection.
Cleaning Your Photos and Scanner
Even seemingly clean photos can harbor microscopic dust. Before scanning, gently clean your photographs using compressed air to dislodge any loose particles. Never use water or chemical cleaners directly on old photos, as this can cause irreversible damage. Similarly, regularly clean the scanner bed with a lint-free cloth and manufacturer-recommended cleaning solutions to ensure a pristine scanning surface. Change cloths often to prevent transferring dust between photos.
Organizing Your Collection
Before scanning, sort your photos by event, date, or people. This organization makes the scanning process more efficient and results in a more structured digital archive, saving time in post-processing and file management.
Mastering Scanner Settings for High-Quality Photo Scans
Correct scanner settings are crucial for capturing the detail, color, and emotional essence of old photos. Adjusting these parameters ensures you get the most from your document scanner.
Resolution (DPI)
This is arguably the most important setting for photo digitization. DPI determines the amount of detail captured.
- 300 DPI: This is a good baseline for general use, especially if you primarily intend to share images on social media or view them on screens.
- 600 DPI: For higher quality scans, which allow for better detail capture and the possibility of producing good-sized prints, a minimum of 600 DPI is recommended. A 4×6 inch photo scanned at 600 DPI will still look great when enlarged to an 8×12 inch print.
- 1200 DPI or higher: For intricate details, very small photographs, film negatives, slides, or if you plan to create poster-sized enlargements, a resolution of 1200 DPI or even 2400 DPI is highly advisable. While higher DPI results in larger file sizes, you can always create lower-resolution copies later; you cannot add resolution to a low-quality scan.
Color Depth
For color photographs, ensure your scanner software is set to capture at 24-bit color or higher. This setting ensures a rich and accurate reproduction of the original photo’s color spectrum.
Image Settings
Most scanner software offers various image adjustment options.
- Select “Photo” Mode: If your scanner software has a specific mode for photos, enable it. This often optimizes the scanner’s internal processing for image quality rather than text clarity.
- Adjust Brightness, Contrast, and Color Balance: These settings allow you to fine-tune the image to match the original’s appearance and compensate for fading. Calibrating your scanner regularly is also recommended for consistent color accuracy.
- Sharpening and Dust Removal: Many scanners offer options for an “unsharp mask” or “dust removal” at low to medium levels. Use these cautiously, as aggressive settings can sometimes introduce artifacts or an unnatural look.
- Multi-pass Option: For severely faded photos, some scanners offer a “multi-pass” option, which scans the image multiple times to gather more color depth and sharpness.
Previewing Your Scan
Always use the preview function in your scanner software. This allows you to check the scan area, make any necessary adjustments to exposure or cropping, and ensure the photo is correctly positioned before performing the final scan. This step minimizes unnecessary handling of your precious originals.
Step-by-Step Guide to Digitizing Photos
With your photos prepared and settings configured, you’re ready to begin the actual digitization process. Follow these steps for efficient and safe scanning.
- Placement: Gently open the lid of your flatbed scanner. Place the photo image-side down on the scanning bed, aligning one corner of the photo with the designated corner on the scanner glass. Ensure the photo lies completely flat.
- Fragile Photos: If you are scanning a particularly fragile photo, consider placing it inside a clear plastic sleeve. This provides an extra layer of protection and can help keep delicate items flat against the scanner glass.
- Initiating the Scan: Close the scanner lid carefully. Depending on your scanner model and software, you can either press the “Scan” button directly on the scanner itself or initiate the scan from your chosen scanning software on your computer.
- Two-Sided Scanning (if applicable): If your photos have notes, dates, or other information written on the back, and your scanner supports two-sided scanning (less common for flatbeds but sometimes available with ADFs), activate this feature in your software to capture this valuable additional data.
- Saving Your Digital Memories: Once the scan is complete, the image will appear in your software. Now is the time to apply any immediate post-processing adjustments and then save the file.
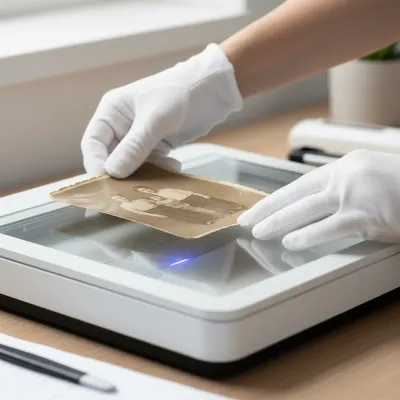 A person carefully placing an old, delicate photo onto a flatbed document scanner.
Choosing the Right File Format and Storage Solutions
The format you choose to save your scanned photos in, and how you store them, will determine their long-term viability and accessibility.
TIFF (Tag Image File Format)
For archival quality and long-term preservation, TIFF is the gold standard. TIFF files are lossless, meaning they retain all image data, even after multiple edits and saves, without any degradation in quality. They are ideal for creating master copies of your scanned photos that you might want to edit extensively in the future or print at very large sizes. The trade-off is that TIFF files are significantly larger than other formats.
JPEG (Joint Photographic Experts Group)
JPEG is a more common and widely used format, producing smaller file sizes due to its lossy compression. While excellent for everyday use, sharing on social media, or emailing, repeated saving of a JPEG can lead to a gradual loss of image quality. If you choose JPEG, always save at the highest possible quality setting. You might consider scanning to TIFF for your archive, and then creating high-resolution JPEG copies for sharing and casual viewing.
Digital Storage Best Practices
Having digital copies is only useful if they are securely stored and accessible.
- Multiple Backups: Never rely on a single copy. Implement a 3-2-1 backup strategy: at least three copies of your data, stored on at least two different types of media, with at least one copy off-site (e.g., cloud storage, external hard drive kept elsewhere).
- External Hard Drives: A reliable option for local backups.
- Cloud Storage: Provides off-site backup and easy access from multiple devices.
- Regular Checks: Periodically check your digital files to ensure they are accessible and in good condition. Convert them to newer formats if necessary as technology evolves.
Physical Preservation
After scanning, remember to store your original physical photos correctly. Keep them out of direct sunlight and in a cool, dry environment. Use acid-free boxes or folders specifically designed for photo storage to prevent further deterioration. Avoid storing precious originals in basements or attics, where extreme temperatures and humidity fluctuations can cause significant damage.
Common Challenges and Troubleshooting
Digitizing old photos can present a few challenges, but many can be overcome with the right techniques and tools.
- Faded Colors: Old photos often suffer from color fading. Your scanner’s software, or external photo editing software, can help restore some vibrancy through color correction and balance adjustments. The multi-pass scanning option (if available) can also capture more data from faded images.
- Dust and Scratches: Despite cleaning, some dust or minor scratches might appear in scans. Many scanner software programs include basic dust removal features, and more advanced editing software can meticulously clean up these imperfections in post-processing.
- Fragile or Curled Photos: For extremely fragile or curled photos, the flatbed scanner is your best friend. A clear plastic sleeve can help flatten curled edges slightly for a better scan. Avoid forcing brittle photos, as they can easily crack.
> “Digitizing old photographs is more than just making copies; it’s an act of preserving history, emotion, and connection across generations. With careful attention to detail and the right tools, you can ensure these visual legacies endure.” – Dr. Emily Carter, Archival Preservation Specialist
Conclusion
Digitizing your old photos with a document scanner is a rewarding project that transforms fleeting physical memories into enduring digital assets. By choosing the right scanner type, meticulously preparing your originals, and mastering the appropriate settings, you can achieve high-quality scans that rival those from dedicated photo scanners. Remember the importance of high resolution, correct file formats like TIFF for archiving, and robust backup strategies. Don’t let your precious family history fade away; take the initiative today to preserve these cherished moments for countless tomorrows. What stories will your newly digitized photos tell your future self?
Frequently Asked Questions
Is a document scanner good enough for photos?
Yes, many document scanners, particularly flatbed models, are perfectly capable of scanning photos at high resolutions. Flatbed scanners are recommended for delicate or oddly sized photos due to their gentle handling, while ADF scanners are faster for sturdy, standard prints if a carrier sheet is used.
What DPI should I use for old photos?
For general digital sharing, 300 DPI is acceptable. However, for higher quality, the ability to print larger sizes, and better detail preservation, a minimum of 600 DPI is recommended. For archival purposes, very small photos, or extreme enlargements, consider 1200 DPI or higher.
How to protect fragile photos during scanning?
Always wear clean cotton gloves when handling old photos. For scanning, place fragile items on a flatbed scanner, ideally within a clear, acid-free protective sleeve, to prevent damage from friction or movement. Avoid using ADF scanners for fragile or delicate prints.
What’s the best file format for scanned photos?
For archiving and maximum quality retention, TIFF (Tag Image File Format) is the best choice as it is a lossless format. For sharing and everyday use where smaller file sizes are preferred, high-quality JPEG is a good option, but be aware it uses lossy compression.
Frequently Asked Questions
Is a document scanner good enough for photos?
Yes, many document scanners, especially flatbed models, are capable of scanning photos at high resolutions. Flatbed scanners are recommended for delicate or oddly sized photos due to their gentle handling, while ADF scanners are faster for sturdy, standard prints if a carrier sheet is used.
What DPI should I use for old photos?
For general digital sharing, 300 DPI is acceptable. For higher quality, larger prints, and better detail preservation, a minimum of 600 DPI is recommended. For archival purposes or extreme enlargements, consider 1200 DPI or higher.
How to protect fragile photos during scanning?
Always wear clean cotton gloves when handling old photos. For scanning, place fragile items on a flatbed scanner, ideally within a clear, acid-free protective sleeve, to prevent damage. Avoid using ADF scanners for fragile or delicate prints.
What's the best file format for scanned photos?
For archiving and maximum quality retention, TIFF (Tag Image File Format) is the best choice as it is a lossless format. For sharing and everyday use where smaller file sizes are preferred, high-quality JPEG is a good option, but be aware it uses lossy compression.
Can I use an ADF scanner for old photos?
ADF scanners can be used for sturdy, standard-sized photos in good condition, but they pose a risk of bending or creasing fragile prints. Always use a carrier sheet to protect delicate items when using an ADF scanner for photos.
Get our weekly buyer guide
Practical specs, not advice. Unsubscribe anytime.
This was really helpful for understanding how to use a document scanner for photos. I always thought I needed a dedicated photo scanner, but my office flatbed actually did a great job after following the preparation steps. My only minor complaint is that it took a bit longer than I expected to get the color correction just right on some of the really old, faded pictures.
Excellent advice! I had a huge box of loose photos from the 80s and 90s that were starting to show their age. The suggestion to clean the photos before scanning was crucial; it saved me a lot of time in post-processing. Now all those precious physical memories are safely backed up and easy to access.
I’ve been meaning to digitize my grandmother’s photo albums for years, and this guide was a lifesaver. I used my existing flatbed document scanner, and the tips on mastering scanner settings made a huge difference. The quality of the digitized images is fantastic, and now I can finally share these memories with my whole family without worrying about the originals getting damaged.
I tried this with my sheet-fed document scanner, hoping to speed things up, but it wasn’t ideal for delicate old photos. While it worked okay for some newer prints, I definitely agree that a flatbed model is better for high-quality photo digitization, especially for anything fragile. It’s a good starting point, but I might need to invest in a different scanner.